Information hierarchy in advertising: headline, body copy and call to action
Information hierarchy in a design means arranging text on three levels: headline, body copy and call to action, so that the reader takes them in the order you intended. On an A5 flyer the headline is typically 28–48 pt, body copy 9–11 pt and the call to action 14–20 pt, picked out with colour or a background panel. Each level should be at least 1.5–2 times larger than the one below it. Keep important elements at least 3–5 mm inside the trim line, and extend backgrounds into a 3 mm bleed.
A flyer, poster or roll-up banner has only a moment to catch someone's eye. If everything shouts equally loudly, the reader doesn't know where to start, and usually doesn't start at all. This guide shows you how to build a clear information hierarchy into your design. It covers how to set the reading order, which type sizes and contrasts to use, and how to work with the eye's natural path. It finishes with a practical redesign of a cluttered flyer.
What is information hierarchy in design?
Information hierarchy is a deliberate decision about what the reader should see first, second and third. It isn't about aesthetics but about reading order. The benefit or headline comes first, then the details, and finally what to do next.
Before you open any design software, write out all your copy on a sheet of paper and number it in order of importance. If more than one item is marked as "most important", the design will be cluttered whatever colours and photos you use. One key message per piece is the basic rule of print advertising.
Three levels of text: headline, body copy and call to action
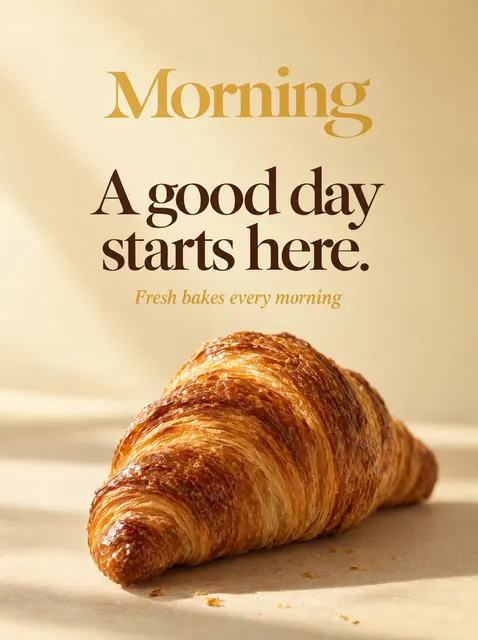
Every effective piece of advertising can be reduced to three levels. The logo, address and small print are supporting elements, not a fourth level competing for attention. Their job is to confirm who the message is from.
| Level | Purpose | Length | Example |
|---|---|---|---|
| 1. Headline | Stop the eye and state the main benefit | 2–7 words | Bathroom refit in 10 working days |
| 2. Body copy | Explain the offer and address doubts | 3–5 bullet points or 2–3 short sentences | Materials included, guarantee, free quote |
| 3. Call to action (CTA) | Tell the reader what to do now | 1 sentence + contact details | Call: 01234 567890 |
| Supporting elements | Identify the sender | Kept to a minimum | Logo, address, website |
What type sizes should you use on flyers, posters and roll-up banners?
Type size depends on the format and the distance from which it is viewed. A flyer is read in the hand and a poster from one or two metres away. A roll-up or banner is read from several metres away, or from a passing car. The values below are practical starting points used by print houses. With thin typefaces and light backgrounds, go towards the top of the range.
Body text in print shouldn't drop below 7–8 pt, and small print on a coloured background is better set at 8 pt or above. Remember that large-format artwork is often prepared at 1:10 scale, so 10 pt in the file means 100 pt in the finished print.
| Format | Headline | Body copy | Call to action |
|---|---|---|---|
| Business card 85×55 mm (90×50 mm in much of Europe) | 10–14 pt (name) | 7–9 pt | phone number 9–11 pt |
| A6 / DL flyer | 20–36 pt | 8–10 pt | 12–16 pt |
| A5 flyer | 28–48 pt | 9–11 pt | 14–20 pt |
| A3 poster | 60–100 pt | 14–20 pt | 24–36 pt |
| A2 / A1 poster | 100–200 pt | 20–36 pt | 40–72 pt |
| Roll-up banner 85×200 cm | letters 8–15 cm high | min. 2–3 cm | 4–6 cm |
| Banner 300×100 cm | letters 20–40 cm high | min. 6–8 cm | 10–15 cm |
Contrast and emphasis: it's not just about size
Size is the most powerful tool, but not the only one. You can also separate levels by weight, colour, position and the amount of white space around an element. A practical rule is that each level should differ from the next by at least two attributes, such as size and weight.
Be strict about colour contrast: use dark text on a light background or the other way round. Light grey on white or red on green may look fine on screen, but they lose legibility in print and in poor light. A simple test is a greyscale print, in which every level should still be clearly distinct.
- Size: the headline at least 1.5–2 times larger than the CTA, and the CTA clearly larger than the body copy.
- Weight: bold or black for the headline, regular for the body copy.
- Colour: reserve one accent colour exclusively for the call to action.
- White space: the more breathing room around an element, the more important it looks.
- Typefaces: no more than 2 type families, e.g. one with character for the headline and one highly legible for the body copy.
- Capitals: only in short slogans, never in longer copy.
The eye's path: the Z pattern and the F pattern
Readers of left-to-right languages start in the top left corner and move their eyes to the right and downwards. Two layouts are based on this observation. They help you place the three levels of text where the eye will land anyway.
The Z pattern works for designs with little text, such as posters, promotional flyers, banners and roll-ups. The eye runs across the top from left to right, cuts diagonally across the design and finishes in the bottom right corner, which is the ideal spot for the call to action. The F pattern suits text-heavy materials such as menus, price lists and information leaflets. The reader takes in the first few lines, then scans down the left-hand edge looking for subheadings and bullet points, so that is where the key words belong.
- Z pattern: logo or headline in the top left corner, photo or benefit along the diagonal, CTA in the bottom right corner.
- F pattern: a strong full-width headline, subheadings and prices aligned left, and the first words of each line carrying the meaning.
- Roll-up banner: the top 20–30 cm is often above the line of sight of someone standing close, and the bottom 40–50 cm is often hidden by people and tables, so keep the headline and CTA in the middle section at eye level.
Example: redesigning a cluttered flyer step by step
Take an A5 flyer for a building and renovation firm. In the original version the logo takes up a third of the page and there are five typefaces. Every service is in bold, the phone number is set in 8 pt in a corner, and the text sits on a background photo with no panel behind it. The reader sees the logo and has no idea what's on offer.
The redesign starts on paper, not in the software. We settle on one key message and cut the copy down to three selling points and a single call to action. Only then do we lay out the elements following the Z pattern. If you'd rather start from a ready-made layout, plakaty.shop (wielkareklama.eu studio) will send you flyer designs from €12 after you fill in a short form. Even so, check the hierarchy and copy against the steps below.
| Element | Before | After |
|---|---|---|
| Headline | Company name used as the slogan | Benefit: "Bathroom refit in 10 working days", 40 pt, bold |
| Logo | A third of the page, centred | Approx. 25–30 mm wide, top left corner |
| Body copy | 12 services, all in bold | 3 bullet points, 10 pt regular, aligned left |
| Typefaces | 5 different ones | 2: sans serif bold + regular |
| CTA | Phone number in 8 pt in a corner | "Call for a free quote" + number in 18 pt on a coloured panel, bottom right |
| Background | Photo behind the text | Photo in the top half, text on a solid background |
| Margins | Text 1 mm from the edge | Min. 4–5 mm inside the trim line, background extended into a 3 mm bleed |
The most common information hierarchy mistakes
Most hard-to-read adverts share the same problems. Before you send your file to print, check the design against the list below.
- The logo as the largest element: readers care about the benefit, not the company mark.
- Several headlines of the same size: the eye jumps around and never settles.
- Everything in bold or underlined: emphasising everything means emphasising nothing.
- No call to action, or several different CTAs at once.
- Text over a photo with no panel or darkening behind it.
- Body copy set in capitals or in a decorative typeface.
- Important information too close to the edge and trimmed off when cut.
Checklist
- You have one key message, and it is the largest text in the design.
- The design has three distinct levels: headline, body copy and call to action.
- Each level differs from the next by at least two attributes (size, weight, colour).
- Body copy is at least 7–8 pt in print, and for 1:10 artwork you have checked the scale conversion.
- You use no more than two type families.
- The call to action sits at the end of the eye's path (Z or F pattern).
- A greyscale print still shows a clear hierarchy.
- Text is at least 3–5 mm inside the trim line, and the background extends into a 3 mm bleed.
- You have personally proofread all the text, phone numbers and addresses.
FAQs
What is the minimum font size for a flyer?
Body text on a flyer shouldn't be smaller than 7–8 pt, and it is most comfortable to read at 9–11 pt. On a coloured or dark background, or with thin typefaces, go for the upper end. Small print, such as promotion terms and conditions, can be 6–7 pt, but only with high contrast.
Where should the call to action go on a poster or flyer?
Usually in the bottom right corner, because that is where the eye's path ends in the Z pattern. Pick it out with an accent colour or a background panel and give it plenty of space around it. In text-heavy materials such as menus, the CTA can run full width along the bottom.
How many typefaces can you use in one advertising design?
Two type families is the safe choice: one for headlines and one for body copy. Build the differences between levels with size and weight within those typefaces. Three or more typefaces usually break up the hierarchy and make the design look cluttered.
What is the difference between the Z pattern and the F pattern in design?
The Z pattern is used in designs with little text, such as posters, banners and promotional flyers. The eye runs across the top, down the diagonal and finishes in the bottom right corner. The F pattern applies to text-heavy materials such as menus and price lists, where the reader scans the left-hand edge and the first words of each line. The choice depends on how much copy the piece carries.
Should the logo be the largest element of an advert?
Usually not. The largest element should be the headline with the customer benefit. The logo acts as a signature and normally sits in a corner of the design. The exceptions are brand campaigns for well-known names and shop signs, where the company name is the main message.
How much text fits on a roll-up banner or banner?
On an 85×200 cm roll-up, a headline of up to 7 words, 3–5 short bullet points and a single call to action with contact details work well. On a banner viewed from the street, use even less: a slogan, one benefit and a phone number or web address. The greater the viewing distance, the fewer the words and the bigger the letters.